Cooking Oil Packaging Machine Guide for Bottled Oil Production
Cooking Oil Packaging Machine Guide for Bottled Oil Production
Bottling cooking oil looks simple until the first real production run. The oil strings off the nozzle and leaves a film on every bottle neck. The caps go on at uneven torque and a few leak in transit. Labels lift at the edges because they went on while the bottle surface was still oily. None of these are exotic failures. They are the normal result of treating oil bottling as “pour and cap” instead of as an integrated line built around a specific product, bottle, cap, and output target.
This guide is written for factory owners, purchasing managers, production managers, and packaging line integrators who are deciding what to actually buy. A cooking oil packaging machine can mean a single semi-automatic filler on a bench, or a full line that feeds empty bottles in at one end and sends cased, coded product out the other. The right answer depends on your oil type, viscosity, bottle format, cap, labeling method, output, and factory layout. Below we give you a structured way to map those variables to a configuration, the places where oil lines usually break, and a checklist of what to prepare before you request a recommendation.
What Is a Cooking Oil Packaging Machine?
“Cooking oil packaging machine” is used loosely in the market. Sometimes it refers to a standalone edible oil filling machine; sometimes it refers to the entire bottling line. It helps to separate the two ideas from the start.
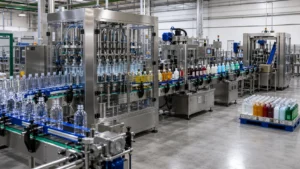
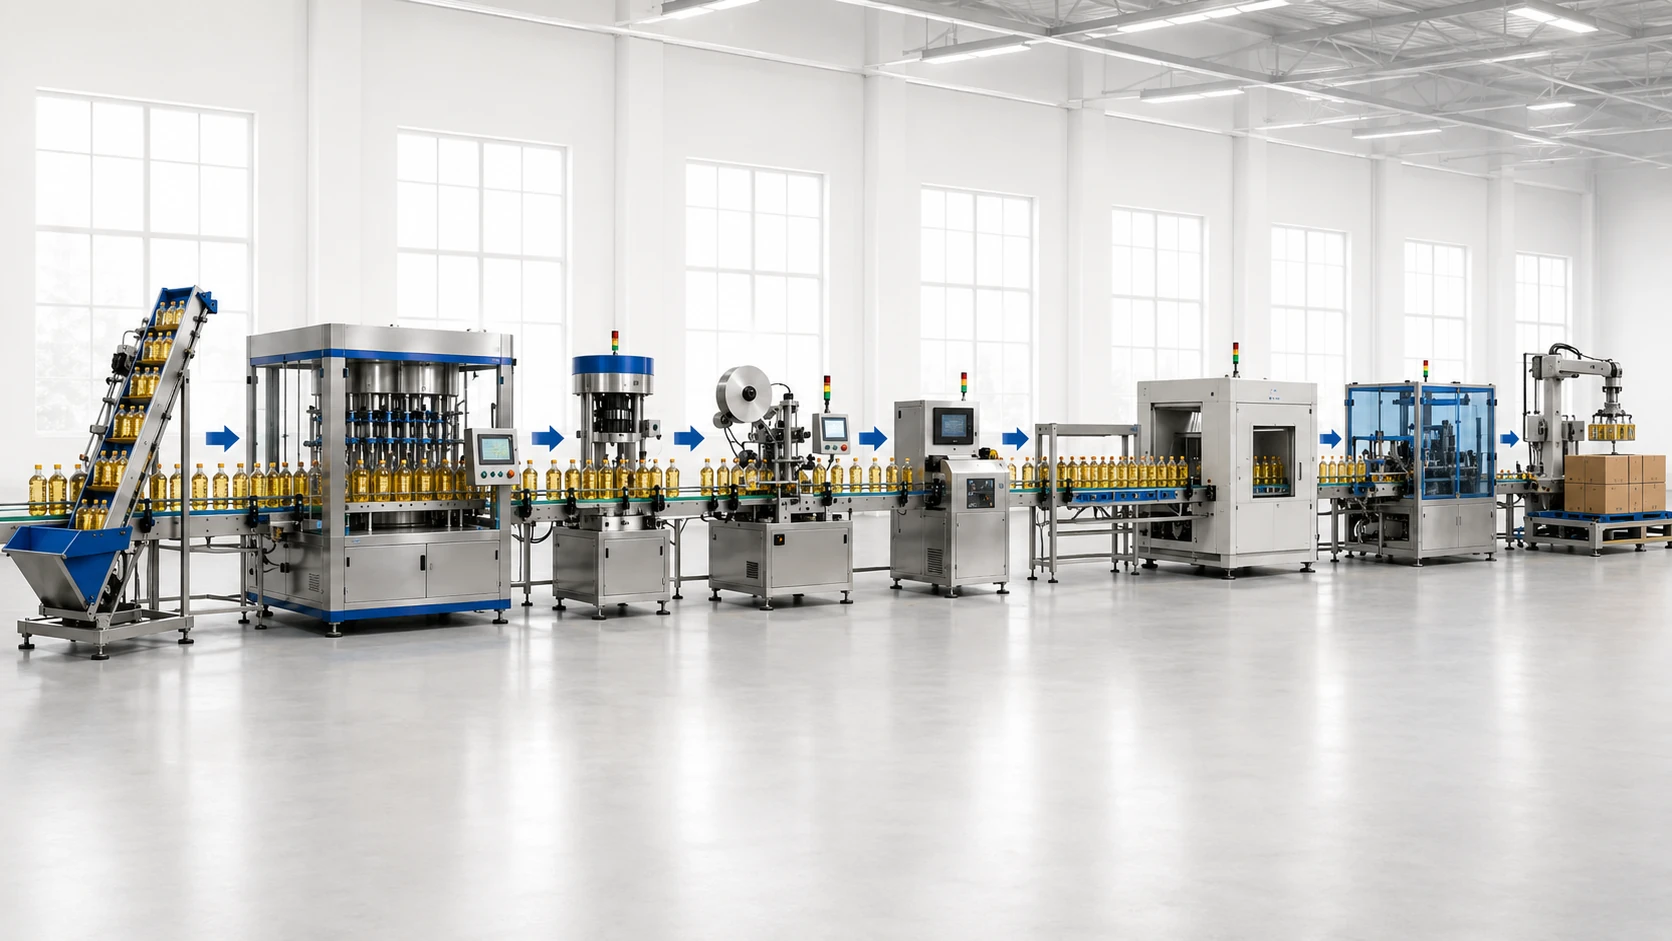
A single machine performs one function: filling, capping, labeling, or coding. A complete oil packaging line connects those machines with conveyors into one synchronized system. Industry suppliers describe a full oil bottling line as a chain of stations: a bottle unscrambler, the filling machine, a capping machine, an inkjet or laser coder, and a labeling machine, with conveyors transporting bottles between stations at matched speeds. A cooking oil bottling line is a complete solution that consists of a bottle unscrambler, liquid filling machine, bottle capping machine, inkjet printer and labeling machine, and is designed to handle various containers and liquids.
The filling section is the technical heart of the line. For edible oils, suppliers typically build around volumetric, piston, gear-pump, or net-weight (load cell) filling, paired with drip-control nozzles. Oil filling machines dispense product using gravity, flow meters, pistons, or weighing systems, and specialized nozzles prevent dripping, foaming, and splashing to protect product quality and keep the line clean. If you want to understand how a single filler is configured before deciding on a full line, our LEKA oil filling machine solutions page covers the standalone machine in detail.
When Do You Need a Complete Cooking Oil Packaging Line?
The line-versus-machine decision is mostly about labor, output stability, and how many of the four functions (fill, cap, label, code) you want automated and synchronized.
A standalone or semi-automatic filler keeps an operator in the loop. The operator places each bottle, triggers the fill, then moves the bottle on for capping and labeling done separately or by hand. This is workable at moderate volumes and where product or bottle changeovers are frequent. For a startup or small business, a semi-automatic filling machine is a cost-effective choice that allows you to test the market and keep initial costs low; for a medium-to-large factory or high-speed needs, an automatic line saves labor, boosts efficiency, and helps ensure consistent product quality.
You are likely past the single-machine stage when several of the following are true: you are running multiple shifts; labor is becoming your bottleneck rather than your fill speed; you need consistent fill weight across long runs; or your customers expect uniform caps, labels, and coding on every unit. Semi-automatic machines shine where product variety or frequent changeovers are common and adapt quickly to different container sizes or viscosities with minimal downtime, while automatic systems reduce the number of operators needed and free staff for quality control and other tasks. The honest framing: automation pays back when your volume is stable and high enough that saved labor and reduced product loss exceed the higher capital cost.
Main Machines in a Cooking Oil Packaging Line
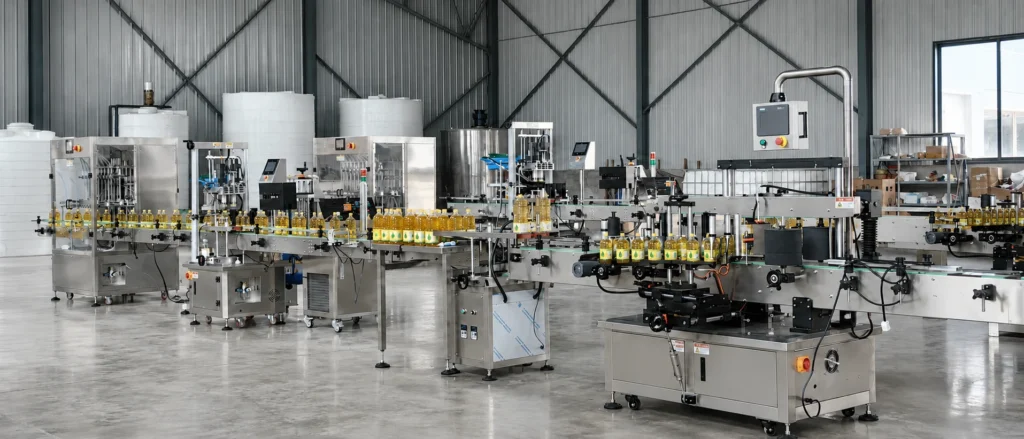
A typical bottled-oil line is built from these stations, in order:
- Bottle unscrambler / feeder. Orients empty bottles upright and feeds them onto the line one by one. The bottle unscrambler puts empty bottles in order before they move onto the line and makes sure they stand straight and go one by one; its speed must match the rest of the line so everything runs smoothly.
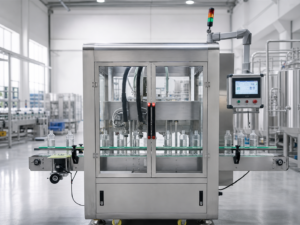
- Filling machine. Meters oil into each bottle by volume, piston displacement, or weight, using anti-drip nozzles. This is the station that most determines accuracy and cleanliness.
- Capping machine. Applies and tightens screw caps, press caps, or tamper-evident closures at controlled torque. Automatic capping units apply screw caps, press caps, or tamper-evident caps with precise torque control.
- Coding machine. Prints date and batch information via inkjet or laser, usually positioned after capping.
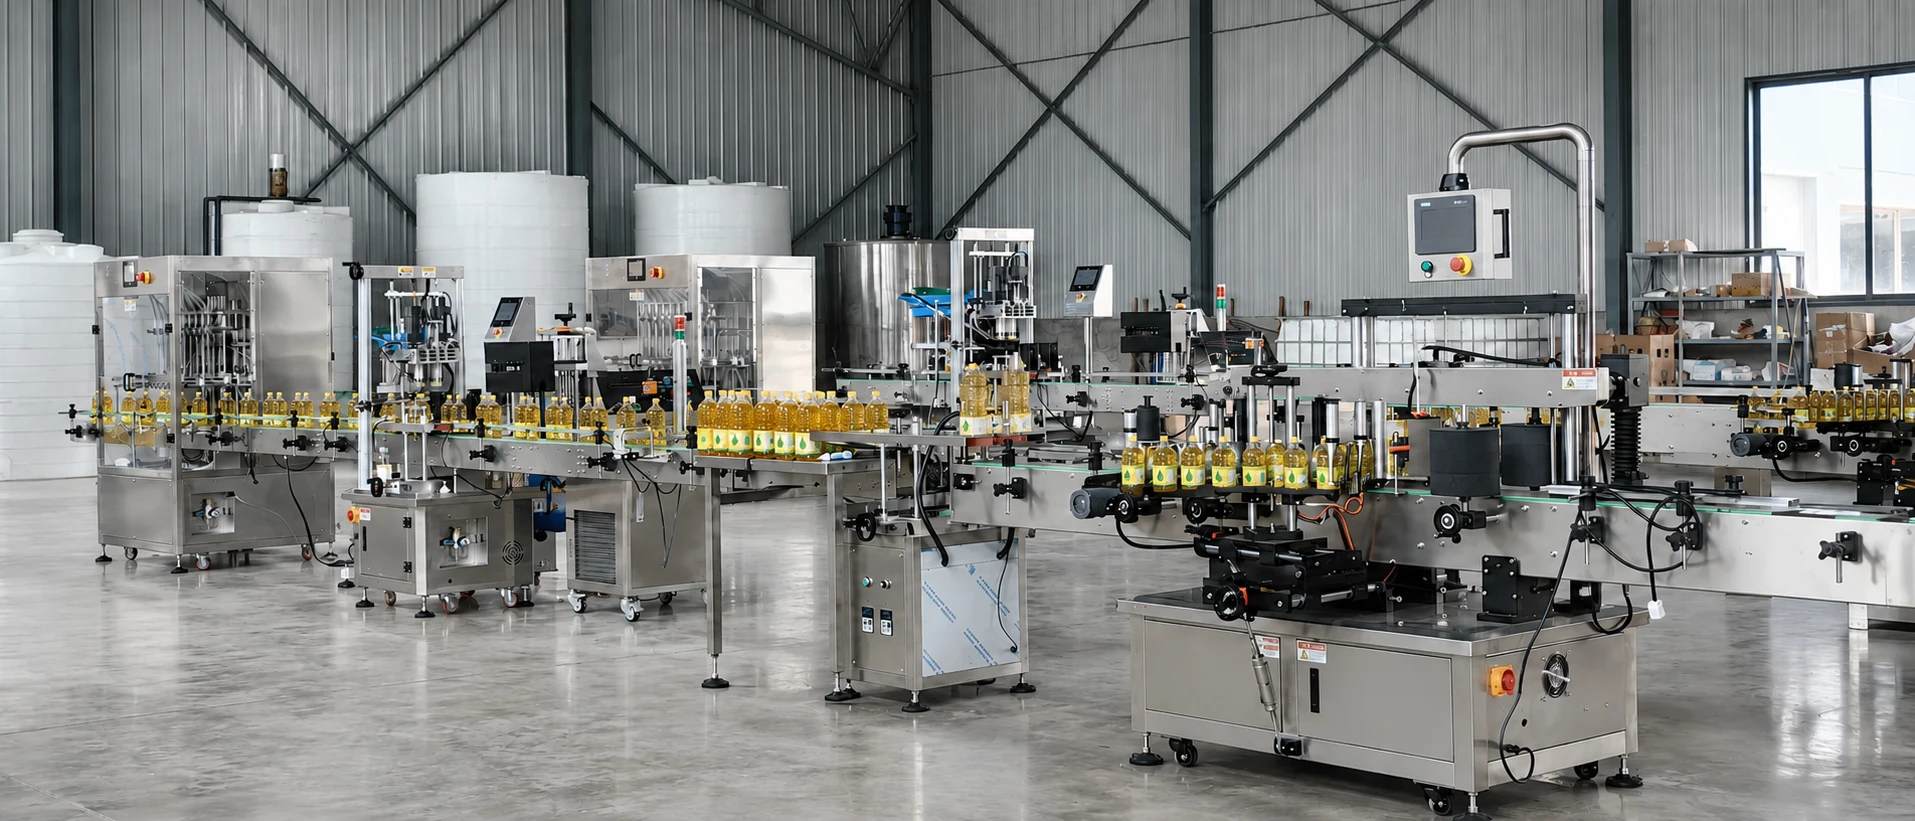
- Labeling machine. Applies front, back, or wrap-around labels. Front, back, and/or wrap-around labeling units apply product labels accurately, with stainless steel conveyors at adjustable speeds synchronizing the entire line.
- Conveyors and packing. Move bottles between stations and feed downstream carton packing.
An optional bottle rinser or air-cleaning station before filling matters for food-grade oil, and a bottle-wiping or air-drying station before labeling is one of the most effective fixes for label adhesion problems on liquid lines (more on this below).
Common Bottle Sizes and Container Types for Cooking Oil
Cooking oil is bottled across a wide format range, and the container material drives nozzle, capping, and labeling decisions. PET and glass dominate retail cooking-oil packaging, with PET especially common for consumer bottles and HDPE jerrycans for bulk formats. Suppliers commonly cite a working range from a few hundred milliliters up to 5 L bottles and larger jerrycans, with weight filling preferred at the larger end.
| Bottle volume | Common material | Typical use | Filling note |
|---|---|---|---|
| 250–500 ml | PET, glass | Premium / specialty retail oils | Volumetric or piston; drip control critical on narrow necks |
| 1 L | PET, glass | Standard retail cooking oil | Volumetric or net-weight; most common SKU |
| 2 L | PET, HDPE | Family / value retail packs | Volumetric or weight filling |
| 5 L | PET, HDPE | Catering / value bulk | Net-weight (load cell) often preferred; longer fill cycle |
| 10–20 L jerrycan | HDPE | Food service, B2B bulk | Weight filling; bottom-up / diving nozzle reduces foam |
PET bottles deserve special attention because they are lightweight, can vary slightly in neck and wall dimensions between batches, and need careful handling at the capping and labeling stations. Our PET bottle oil filling line setup guide goes deeper into PET-specific bottle handling.
Filling Methods for Cooking Oil and Edible Oil
Choosing the metering method is the single most consequential decision in an oil line, and it depends on oil viscosity, bottle size, temperature variation, and required accuracy. The main approaches:
- Volumetric / gravity filling. Suited to low-to-medium viscosity oils, dispensing a set volume per bottle. Volumetric filling is ideal for low-to-medium viscosity oils and ensures each bottle is filled with a specific volume; gravity filling lets low-viscosity oil flow naturally from the nozzles.
- Piston / gear-pump filling. Better for thicker oils and for repeatable dosing. Piston filling uses a piston to precisely draw and dispense thicker oils into containers. Gear-pump systems are common on multi-nozzle oil lines.
- Net-weight (load cell) filling. Fills to a target weight rather than volume, which removes the error that temperature and viscosity introduce into volume-based fills. Weighing fillers use load cells to control fill weight and are used for large containers like tins, jars, jerrycans, and drums, giving weight consistency regardless of viscosity or temperature. This is why weight filling is often chosen for 5 L and larger formats.
One practical point that gets overlooked: oil viscosity and temperature change together. A line set up for volumetric accuracy in a warm season can drift when the same oil is colder and more viscous, because the same dispensed volume weighs differently and flows differently. Weight-based filling eliminates volume errors due to temperature or viscosity changes. If you ship to markets with seasonal temperature swings, raise this with your supplier early. For help matching a method to a specific edible oil before you commit to a line, see our edible oil filling machine selection guide.
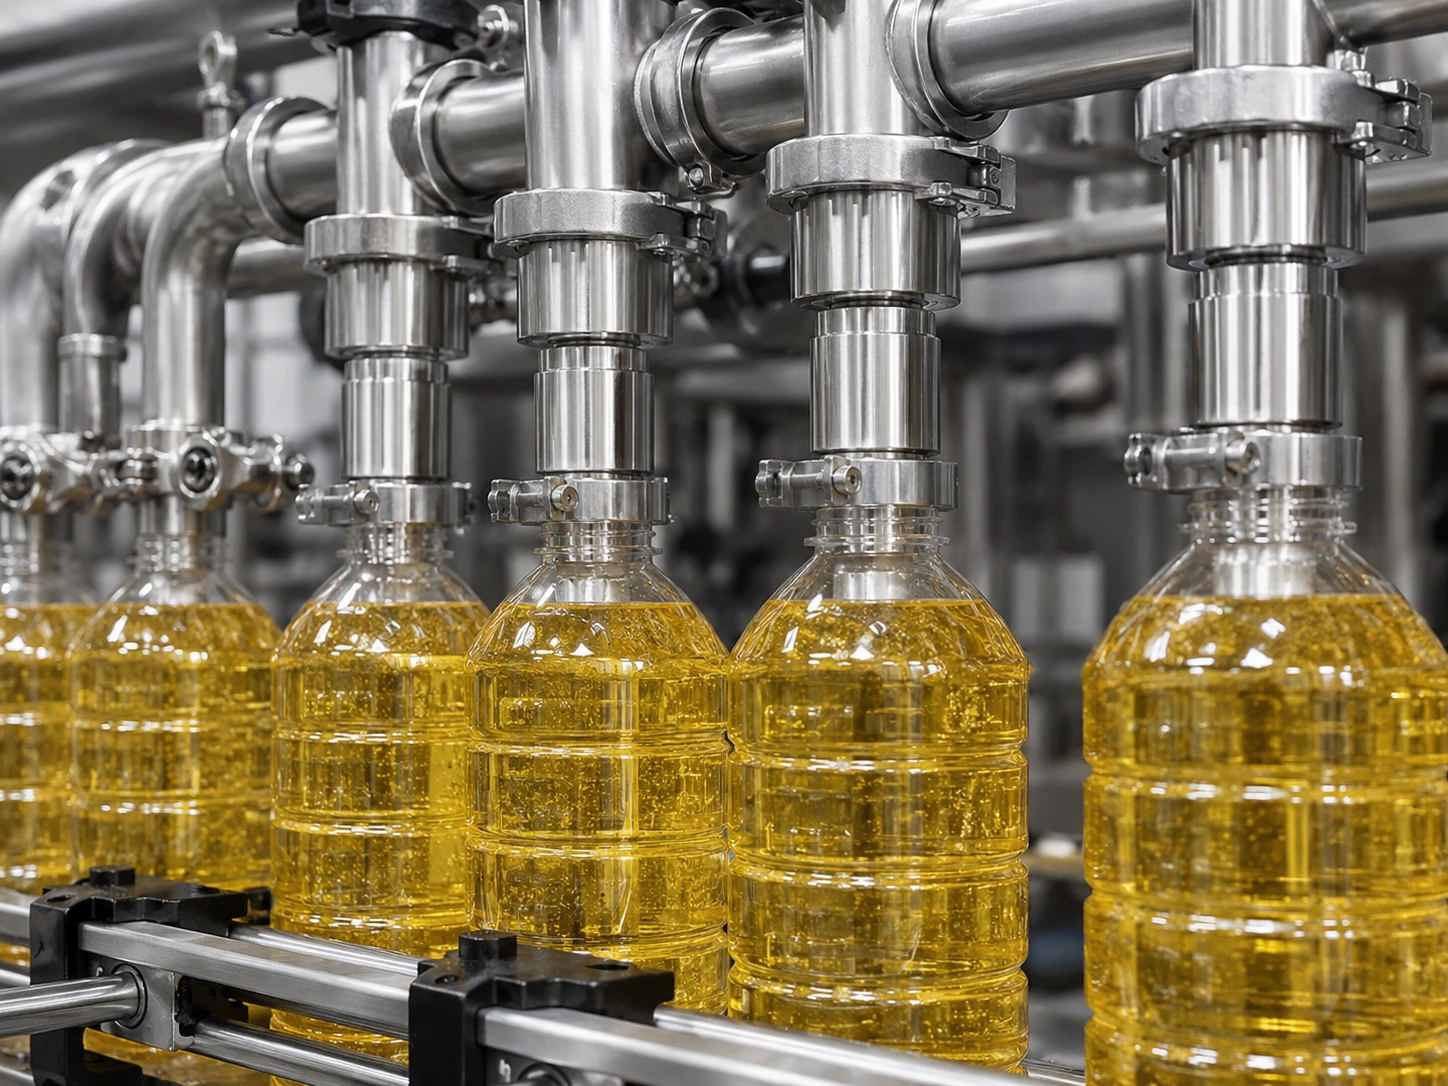
Why Anti-Drip Filling Matters for Oil Bottles
Oil’s behavior at the nozzle is different from water’s, and it creates two distinct problems that buyers often lump together: dripping and stringing. They have different causes and different fixes.
Stringing is a nozzle issue sometimes confused with dripping; it occurs at the end of the fill when the valve shuts and product flow has ceased, and instead of breaking cleanly, a “string” of product forms. Stringing can be difficult to control and generally can’t be caught with a drip pan the way dripping can.
Why it matters commercially: oil left on the bottle neck or thread interferes with capping and is a leading cause of label adhesion failure downstream. The accepted engineering responses are positive-shutoff or pneumatic shut-off nozzles, diving (bottom-up) nozzles for foam-prone fills, and drip trays. On oil-filling machines, a pneumatic shut-off nozzle prevents liquid from dripping, bottom-up filling is available for foamy liquid, and a stainless steel drip tray keeps the environment sanitary. Bottom-up filling techniques or diving nozzles minimize agitation as the container fills from the base, which reduces foaming.
For oil specifically, repeat fill accuracy and a genuinely drip-free nozzle arrangement, often a diving nozzle with a drip tray, are standard specification points to confirm rather than assume.
Capping Setup for Cooking Oil Bottles
Capping is where oil-on-the-neck and torque consistency turn into leakers and rejects. The cap type drives the capping head: screw caps, press/snap caps, and tamper-evident closures each need different tooling, and torque must be controlled so caps are neither loose (leak risk) nor over-tight (cap damage, removal complaints).
Capping is also a top source of line downtime when it is poorly synchronized. Capping machine reliability directly impacts overall line efficiency; misaligned caps are often due to improper synchronization between the capping machine and the conveyor, and jams come from damaged caps, residue buildup on the guides, or conveyor misalignment. A practical implication: a cap feeder and the capping head have to be matched to your exact cap, and the whole station’s timing has to match the filler and conveyor. This is a strong argument for specifying your cap (with photos and samples) before configuration, not after.
Labeling and Coding for Cooking Oil Packaging
Labeling is the station most often blamed for problems that actually originate upstream. On oil lines, the recurring failure is labels that lift or wrinkle, and the root cause is frequently a wet or oily bottle surface at the moment of labeling.
Poor label adhesion is almost always a combination of surface, adhesive, and environmental factors; on liquid filling lines, bottle moisture from the filling and capping stages, if labeling occurs too soon after filling, is a particularly frequent cause of adhesion failure. The fix is to introduce a bottle wiping or air-drying station upstream of the labeling station.
Label position and adhesion also depend on container geometry. A cylindrical PET or glass oil bottle wants a wrap or rotary applicator; a flat or oval bottle needs a different applicator entirely. A surprising number of labeling headaches are not label problems but the wrong tool for the container geometry; cylindrical containers want a round-container labeler for straight, repeatable wrap application.
Date and batch coding (inkjet or laser) is usually placed after capping. The main thing to get right is coding position and that the code surface is clean and dry, again pointing back to drip control upstream.
Semi-Automatic vs Automatic Cooking Oil Packaging Machine
Rather than a generic “automatic is better” claim, use this decision model. It maps your real situation to the configuration that usually fits.
| Decision factor | Points toward semi-automatic | Points toward automatic line |
|---|---|---|
| Output / volume | Low to moderate, single shift | High, stable, multi-shift |
| Labor cost & availability | Labor available and affordable | Labor is the bottleneck or expensive |
| Product / bottle variety | Frequent changeovers, many SKUs | Few SKUs, long runs |
| Fill consistency needs | Operator oversight acceptable | Tight, repeatable fills required over long runs |
| Capital budget | Lower upfront, faster install | Higher upfront, justified by labor/loss savings |
| Footprint | Limited floor space | Space for full inline layout |
The underlying economics, in plain terms: if your demand is high and steady, automation pays back quickly; if it is variable or specialty, semi-automatic flexibility often delivers better overall economics. Many growing producers buy a semi-automatic filler first as their entry point, then add capping, labeling, and conveyors as volume justifies it. There is no single correct answer; it depends on oil type, output, labor, and budget.
How to Choose the Right Cooking Oil Packaging Line
Use this as a structured way to specify your line. We call it the 6-Point Cooking Oil Packaging Line Fit Map, six dimensions that together determine the configuration. Skipping any one of them is where mismatched quotes come from.
| # | Fit dimension | What to define | What it determines |
|---|---|---|---|
| 1 | Oil type & viscosity | Sunflower, soybean, palm, olive, blended; thin vs thick; cold-climate behavior | Filling method (volumetric / piston / weight), nozzle design |
| 2 | Bottle format | Material (PET / glass / HDPE), volumes (500 ml–5 L+), neck and shape | Filler heads, bottle handling, unscrambler, capping tooling |
| 3 | Filling method | Volume-based vs weight-based; number of nozzles | Accuracy, temperature tolerance, throughput |
| 4 | Cap / closure | Screw / press / tamper-evident; cap dimensions and material | Capping head type, cap feeder, torque control |
| 5 | Label & coding | Front/back/wrap; sticker vs sleeve; date and batch code requirements | Labeler type, drying station need, coder type and position |
| 6 | Output & layout | Target bottles/hour, shifts, floor dimensions, voltage | Automation level, conveyor design, line length, line vs U-shape |
The recurring lesson from how oil lines actually get specified: the bottle, cap, and output are the anchor. A line designed around a real bottle sample and a real cap sample, with a defined output target, avoids most of the rework that comes from guessing. To understand how output targets translate into machine speed and configuration, our bottle filling machine output guide walks through the relationship between throughput and line design, and our edible oil filling line application overview shows how these elements come together in real edible-oil setups.
Where Cooking Oil Packaging Line Problems Usually Happen
Most line problems cluster at a few predictable points. Knowing them in advance helps you specify the right safeguards rather than discovering them in production.
| Stage | Common problem | Typical root cause | Design / spec response |
|---|---|---|---|
| Filling | Drips and stringing on bottle neck | Wrong nozzle for oil; valve doesn’t break cleanly | Positive-shutoff / diving nozzle, drip tray, fill-speed tuning |
| Filling | Fill weight drifts | Temperature/viscosity change with volumetric fill | Net-weight (load cell) filling for larger formats |
| Capping | Loose caps / leakers / jams | Oil on threads; torque off; cap–conveyor desync | Clean-neck control, torque setting, cap feeder matched to cap |
| Labeling | Labels lift or wrinkle | Wet/oily bottle at labeling; wrong applicator for shape | Bottle wipe/air-dry station upstream; applicator matched to geometry |
| Coding | Smeared or misplaced code | Wet surface; coder position | Dry surface upstream; confirm code position and method |
| Conveyor / line | Bottle backups, station starvation | Station speeds not synchronized | Conveyor synchronization across all stations from the start |
Cooking Oil Bottle Type and Machine Setup Map
This maps common bottle/oil situations to a starting configuration. Treat it as a starting point for discussion, final configuration depends on your exact samples and output.
| Situation | Filling | Capping | Labeling | Automation starting point |
|---|---|---|---|---|
| 500 ml–1 L PET, thin oil, retail | Volumetric / gravity, multi-nozzle | Screw-cap, torque-controlled | Wrap-around / rotary, drying station | Automatic inline if volume is high |
| 1 L glass, premium oil | Volumetric or piston | Screw or press cap | Front/back precision labeler | Semi-auto to automatic depending on output |
| 2–5 L PET/HDPE, value pack | Net-weight preferred | Screw cap, larger head | Wrap-around | Automatic for stable high volume |
| 10–20 L HDPE jerrycan, B2B | Net-weight, bottom-up nozzle | Press/screw, heavy-duty | Front label or wrap | Semi-auto often sufficient; automate if volume justifies |
| Multiple SKUs / frequent changeover | Flexible volumetric/piston | Adjustable head | Adjustable applicator | Semi-automatic for flexibility |
Buyer Checklist Before Requesting a Quote
The fastest way to get an accurate recommendation, and to avoid back-and-forth, is to prepare these details before you make contact. This is the information any serious supplier needs to configure an oil line correctly.
- Oil type and viscosity. Which oil(s), thin or thick, and whether it is sold into cold-climate markets.
- Bottle details. Material (PET / glass / HDPE), each volume you fill (e.g., 500 ml, 1 L, 5 L), and ideally bottle photos or a physical sample.
- Cap details. Cap type (screw / press / tamper-evident), dimensions, and cap photos or samples.
- Label and coding method. Front/back/wrap, sticker or sleeve, and what date/batch coding you need.
- Target output. Bottles per hour and number of shifts.
- Factory layout. Available floor space and shape (straight line vs U-shape).
- Voltage and power. Your local electrical supply.
- Budget and automation level. Whether you want semi-automatic now with room to expand, or a full automatic line.
If you are still early and don’t have all of this yet, that’s fine, you don’t need to be ready to buy. The quickest first step is to send your oil type, bottle photos, cap photos, and target output. With just those four items we can tell you whether you’re looking at a single machine or a full line, and what to think about next.
FAQ About Cooking Oil Packaging Machines
Do I need a full line, or is one filling machine enough?
It depends on your output and how much labor you want to remove. A single semi-automatic filler suits moderate volumes and frequent changeovers; a full line suits stable, higher-volume production where labor is the bottleneck.
Volumetric or weight filling for cooking oil?
Volumetric or gravity filling is common for thinner oils and smaller bottles. Net-weight filling is often preferred for larger formats (5 L and up) and where temperature and viscosity vary, because it removes volume error caused by those changes.
How do I stop oil dripping and stringing on the bottle neck?
Use positive-shutoff or pneumatic shut-off nozzles, a diving (bottom-up) nozzle arrangement for foam-prone fills, and a drip tray. Confirming a genuinely drip-free nozzle setup is a standard specification point for oil lines.
Why do my labels keep lifting?
The most common cause on oil lines is a wet or oily bottle surface at the labeling station. Adding a bottle wiping or air-drying station upstream of the labeler, and matching the applicator to your bottle shape, resolves most cases.
Can one line handle different bottle sizes?
Often yes, with changeover. The more SKUs and the more frequent the changeovers, the more a flexible semi-automatic or adjustable configuration makes sense. Define your full SKU range up front so the line is specified for it.
What do you need from me to recommend a configuration?
At minimum: oil type, bottle photos/samples, cap photos/samples, and target output. Voltage, layout, label method, and budget let us refine the recommendation.
Conclusion: Build the Oil Packaging Line Around the Real Bottle, Cap and Output
The recurring theme across every section here is the same: oil bottling problems, drips, leakers, lifting labels, line backups, are usually configuration problems, not bad luck. They get designed out when the line is built around a specific oil, a real bottle and cap, and a defined output target, rather than around a generic “cooking oil packaging machine.” The 6-Point Fit Map, the problem-location table, and the bottle setup map above exist so you can specify those variables deliberately instead of discovering them in production.
When you’re ready, send us your project parameters and we’ll come back with a configured recommendation: oil type, bottle volume(s), bottle sample or photos, cap type, label method, target output, factory layout, voltage, and budget. With those, we can advise whether a single cooking oil filling machine or a complete cooking oil packaging line fits your operation, and how to lay it out around your real bottle, cap, and output. The more detail you send, the more precise the recommendation, and the fewer surprises on your first production run.